Sandbox Mode
How to Install Wall Flashing Trims Video and Installation Guide
Learn How to Fit Wall Trims and use of Elastoform Tape on Wall Ends with this video and step-by-step installation guide.


Step by Step Installation Guide
-
Grind A Slot In The Wall

Chase out a slot in the wall using a mortar chisel or angle grinder. (Wall trims or lead flashing should always be a minimum of 150mm from the roof deck.
-
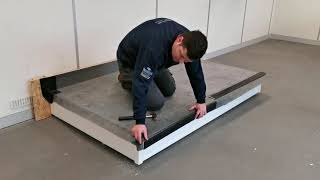
Trim Excess Rubber Membrane

After fitting the rubber membrane (Follow Main Installation Guide) trim excess membrane using a sharp knife following the chase out in the wall.
-
Cut Membrane At End Of Wall

Cut the rubber membrane vertically or at an angle away from the corner using a sharp knife.
-
Cut Elastoform Tape To Size

Cut Elastofrom to size. The tape should be a minimum of 150mm wide and extend from the chase out on to the deck and along the roof a minimum of 75mm (3"). Standard size of tape required 225mm x 150mm per end
-
Apply Rubber Primer

Apply rubber primer and allow to dry.
-
Install Elastoform Tape

Install Elastoform Tape starting at the top of the wall.
-
Mold Elastoform Tape Into Position

Mold Elastoform tape in to position by stretching the tape where necessary. TIP: Keep the tape in a warm place prior to use this will help its formability.
-
Apply Pressure To Elastoform Tape

Apply pressure to Elastoform tape using silicon seam roller and penny roller.
-
Install Wall Trim

Install wall trim in to the slot. Additional wall trims should be overlapped by a minimum of 75mm (3").
-
Drill Wall Trim

Drill wall trim and wall with a 7mm masonry drill.
-
Insert Raw Plug

Insert raw plug in to the hole.
-
Screw In Fastener

Screw in perimeter fastener using hex bit and drill. 3 fasteners are provided with each wall trim. Install one at each end and one in the middle.
-
Apply Lap Sealant to Wall Trim

Apply Lap Sealant to Wall Trim.


What you'll need


- Stanley Knife
- 9 Inch Elastoform Uncured Tape
- Rubber Primer
- Professional Seam Roller
- Brass Penny Roller
- 7mm Masonry Drill
- Hammer Drill
- Raw Plugs
- Screw Gun with Hex Head