Sandbox Mode
How to Install an EPDM Gutter Lining Video and Installation Guide
Step by step guide to installing the self adhesive EPDM gutter lining system
Step by Step Installation Guide
-
Prep Your Gutter

Make sure your gutter is clean and dry. Refer to the manufacturers installation manual for bonding to different substrates.
-
Stir the FG35 Primer

Stir the FG35 Primer.
-
Apply FG35 Primer

Apply a thin coat of the FG35 primer using a medium pile paint roller or mini roller.
-
Ensure Primer is Touch Dry

Ensure the FG35 Primer is dry to the touch. This normally takes around 30 minutes.
-
Measure your Gutter

Measure your gutter base and sides.
-
Mark Release Paper

Copy the dimensions on to the release paper on the underside of the gutter lining.
-
Score Release Paper

Carefully score the release paper with a sharp knife ensuring that the gutter lining is not cut.
-
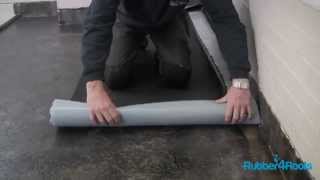
Position Rubber Membrane in Gutter

Position the rubber membrane in the gutter allowing sufficient membrane to form the stop end.
-
Remove First Section of Release Paper

Peel off first section of release paper from one of the gutter sides. (NOT THE BASE)
-
Fold Membrane back on itself

Fold membrane back on it self to expose second section (BASE) of release paper
-
Remove Second Section of Release Pap

Remove the release paper from the base of the gutter lining and smooth the EPDM lining on to the gutter base
-
Remove the Final Section of Release Paper

Remove the final section of release paper from the back of the EPDM gutter lining and press in to position.
-
Use Seam Roller or Stiff Brush

Use Seam Roller or Stiff Brush to press the EPDM gutter lining on to the gutter base and sides
-
Cut the Membrane on the corners

Using a sharp pair of scissors cut the membrane on the corners to allow it to fold up the stop ends.
-
Remove Stop End Release Paper

Remove the centre section of the stop end release paper.
-
For the Stop End Pleats

Form the stop end pleats or pigs ears.
-
Remove Release Paper

Remove the relase paper and bond in to position.
-
Trim Excess EPDM Membrane

Trim the excess membrane prior to installing trim or lead flashing on brick work.
-
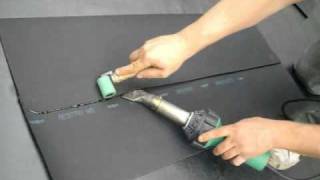
Heat Weld Patches on EPDM

Heat weld patches where the membrane has been cut,. a minimum 50mm overlap is required for heat welding.
-
Waterproofing the Stop End Pleats

An additional section of membrane can be heat welded in to position to cover any pleats on the stop ends.
WHEREVER EPDM MEMBRANE IS TO BE BONDED TO EPDM MEMBRANE THIS SHOULD BE HEAT WELDED AND NOT STUCK WITH FG35 PRIMER -
Heat Weld Laps

Heat weld EPDM laps where necessary
-
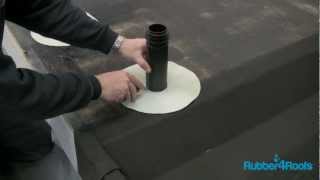
Fit Edging Trims

Fit your chosen edge trim system from where necessary


What you'll need


- Self Adhesive EPDM Primer FG35
- Professional Sheepskin Roller
- Sharp Stanley Knife
- Professional Seam Roller
- Steinel Heat Gun 240V